

3pcs 220V XH-W3002 Micro Digital Thermostat High Precision Temperature Control Switch Heating and Cooling Accuracy 0.1
150

 Direct purchase from the factory
保證安全結帳

 免費禮物
免費禮物
 運送政策
運送政策 退貨政策
退貨政策免費禮物
歡迎來到Roymall,您的專業購買高級百貨禮物的網站。我們非常重視並感謝您的支持,並希望通過為您的購買增添額外的驚喜來表達我們的感激之情。當您與我們一起購物時,您不僅可以享受提升生活品質的高品質產品,還可以在每次訂單中獲得獨家免費禮物。 準備好探索我們的收藏並找到您的完美禮物了嗎?瀏覽我們的高級百貨商品選擇,下訂單,並期待您的免費禮物與您的購買一起到來。運送政策
我們將努力在收到您的訂單後將商品安全送達您手中。運送詳情將在您的確認郵件中提供。在大多數情況下,訂單將在2天內處理。在特殊情況下,可能會延遲如下:當您在週六、週日或公共假期下訂單時,將延遲2天。通常需要5-7個工作日(週一至週五),不受航班延誤或其他環境因素影響。由於我們的運送服務是全球性的,運送時間將取決於您的位置,因此可能需要幾天時間,如果您位於偏遠地區或國家,請耐心等待。1. 退貨與換貨政策
我們僅接受在roymall.com購買的商品。如果您從我們的本地分銷商或其他零售商處購買,則無法在我們這裡退貨。 最終銷售商品或免費禮物不可退貨。要符合退貨條件,您的商品必須未使用且與收到時的狀態相同。還必須保留原始包裝。收到我們的退貨指示後,請將退貨商品打包並將包裹送至當地郵局或其他快遞服務。我們將在收到退貨商品後3-5個工作日內處理您的退貨或換貨。退款將自動處理並記入您的原始付款方式。如果商品是根據訂製生產的,包括訂製尺寸、訂製顏色或訂製印刷,則不可退貨或換貨。需要更多幫助,請聯繫我們。 service@roymall.com 或 Whatsapp: +8619359849471
2.退款政策
在我們收到並確認退貨包裹後,您將獲得全額退款或100%商店信用。退款將自動處理並記入您的原始付款方式。 請注意,運費及任何關稅或費用不可退款。包裹發貨後,額外運費不可退款。您需負責支付這些費用,我們無法免除或退款,即使訂單被退回給我們。一旦我們收到並確認您的退貨商品,我們將向您發送電子郵件,通知您我們已收到您的退貨商品。我們還將通知您退款的批准或拒絕。如果您在退款過程中有任何問題,請聯繫我們。 service@roymall.com 或 Whatsapp: +8619359849471
Feature:
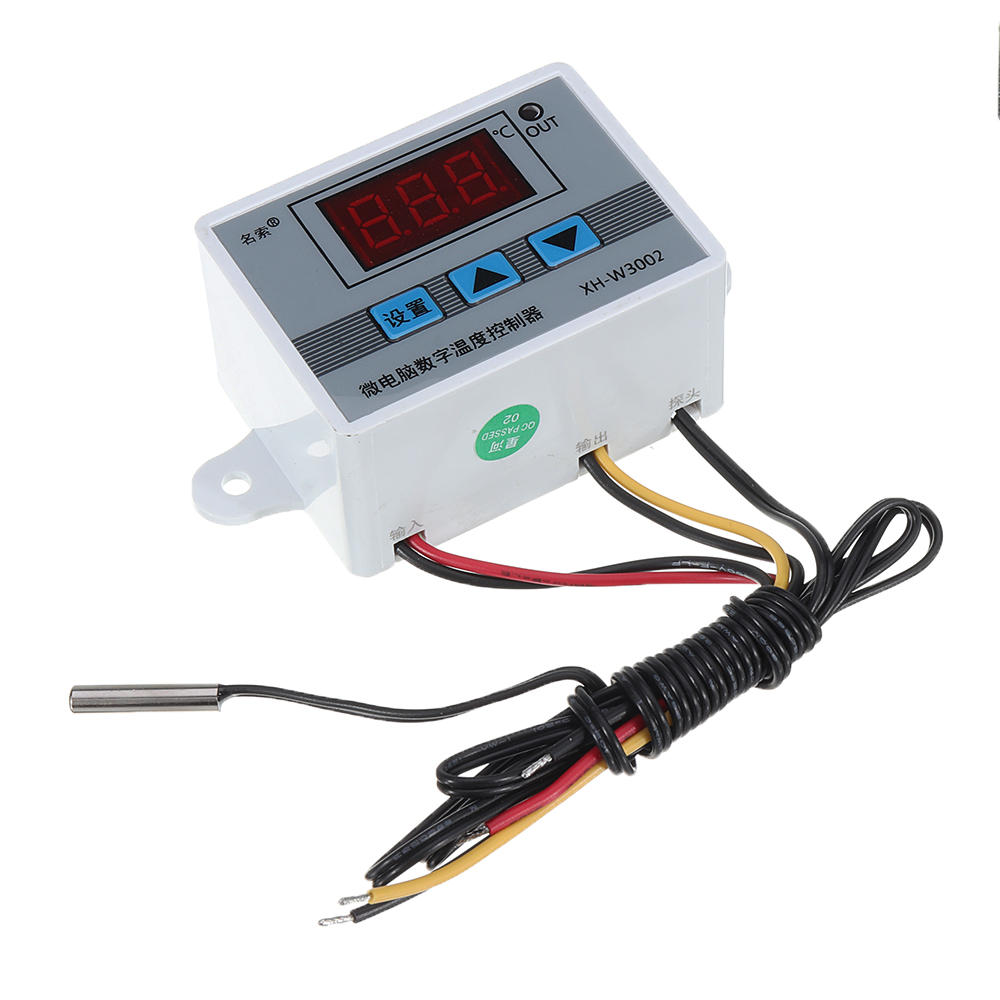
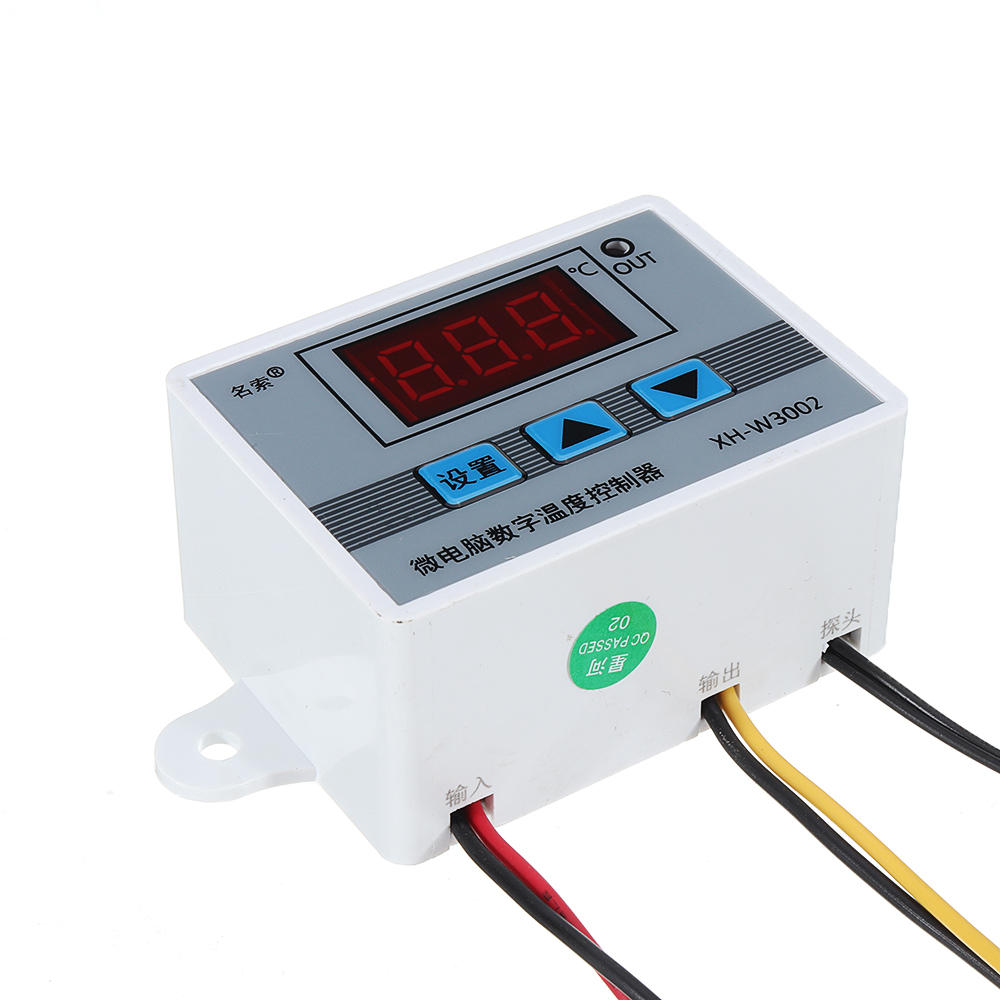
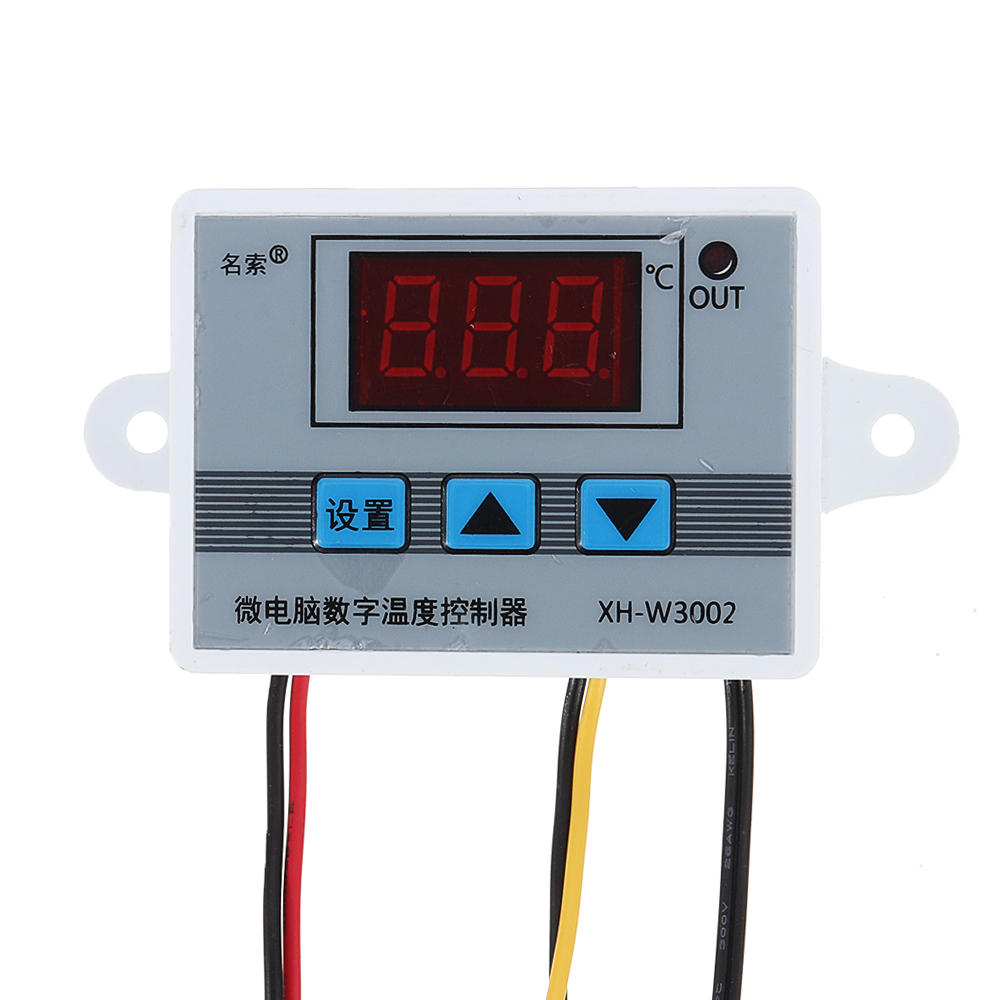
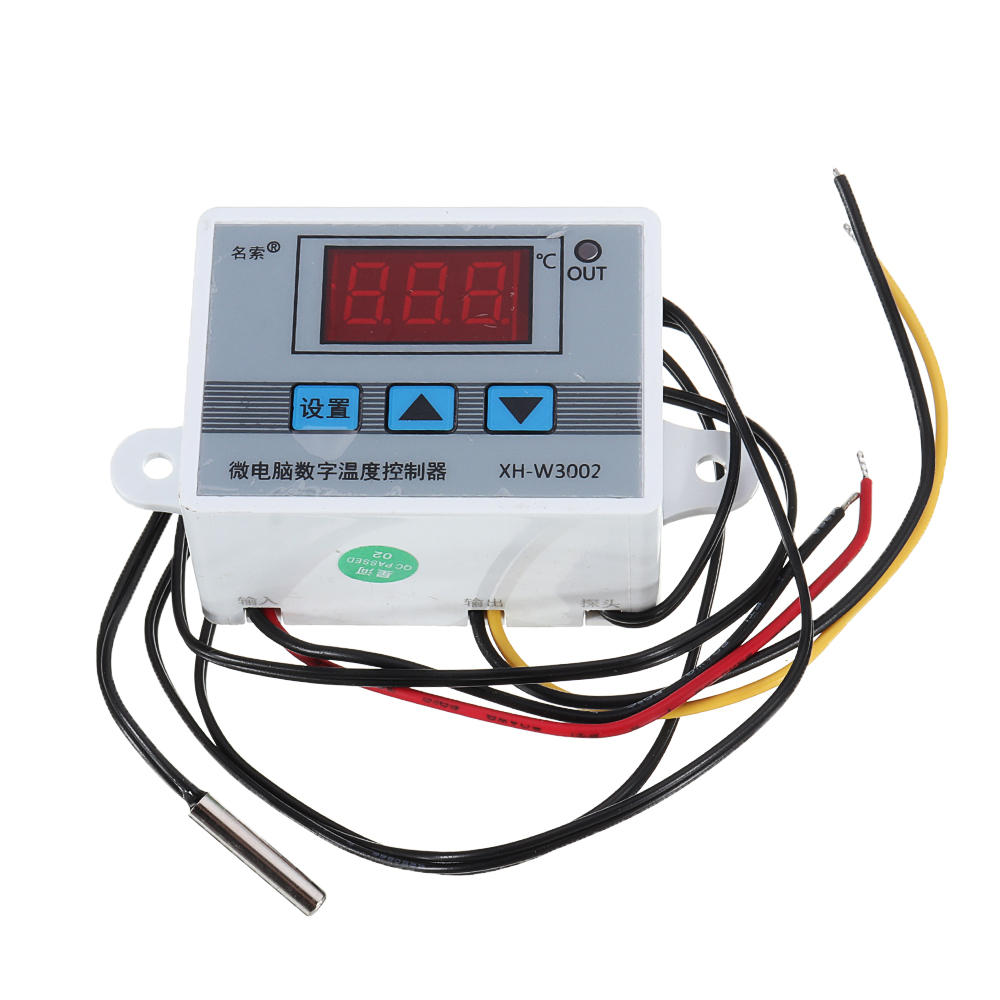
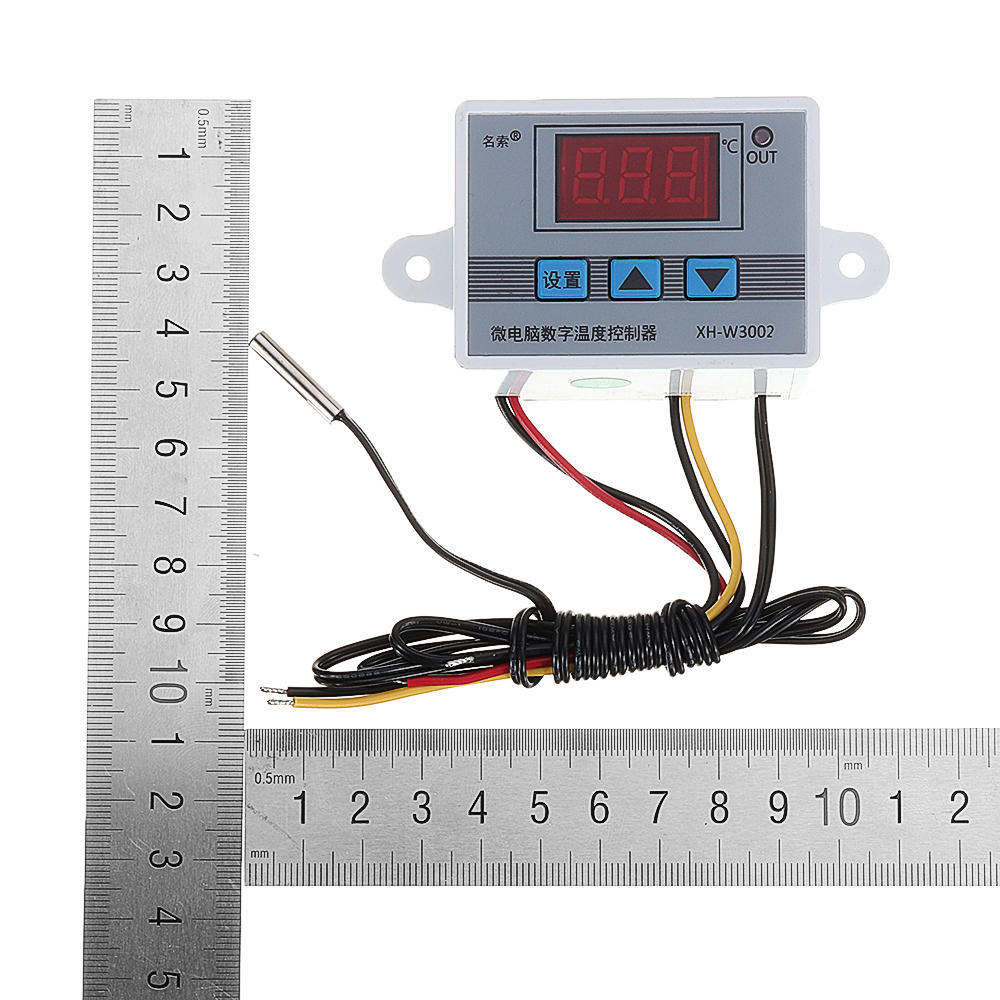
Product Name: Microcomputer Temperature Controller
Product Name: Microcomputer Temperature Controller
Product model: XH-W3002
Temperature range: -50~110°C
Temperature control range: -50~110°C
Temperature measurement accuracy: +-0.2 °C
Temperature control accuracy: +-0.1 °C
Temperature probe: NTC10K (B3950) 1 meter waterproof probe
Supply voltage: DC12V/DC24V/AC220V
Output power: AC220V: 1500W
Output type: direct output
Appearance size: 60 x 45 x 31mm
Opening size: 73mm (aperture 4mm)
Package includes:
3 x Microcomputer Temperature Controller
Wiring:
Package includes:
3 x Microcomputer Temperature Controller
Wiring:
Products related to this item
Loading related products...
❮
❯
Videos for similar product
Loading product videos...
❮
❯
Electronics Ranking


nt
nt
nt
nt
nt
nt
nttKey Description:
ntntt
ntnttUp key: Short press to display the starting temperature, long press to set the starting temperature.
ntnttDown button: short press to display the stop temperature, long press to set the stop temperature.
ntnttShutdown button: Press to turn off the thermostat, and then press to turn on the thermostat.
ntt
nttnttt
ntt
ntt
ntt
nntt
ntt
| nttttttCode | ntttttnttttttCode description | ntttttnttttttSetting range | ntttttnttttttFactory setting | ntttt
| nttttttP0 | ntttttnttttttStarting temperature | ntttttntttttt -50~110°C | ntttttntttttt25 | ntttt
| nttttttP1 | ntttttnttttttStop temperature | ntttttntttttt -50~110°C | ntttttntttttt40 | ntttt
| nttttttP2 | ntttttnttttttTemperature correction | ntttttntttttt -10~10°C | ntttttntttttt0°C | ntttt
| nttttttP3 | ntttttnttttttDelayed start | ntttttntttttt0-10 minutes | ntttttntttttt0 | ntttt
ntt
ntttP0. Set the startup temperature:
nttnttt
nttntttPress the Setup button to enter the internal menu. The default display is P0. Press the Setup button again and set the desired startup temperature by pressing the up and down buttons.
nttnttt
nttntttP1. Set the stop temperature:
nttnttt
nttntttPress the setup button to enter the internal menu, the display is P0, switch to P1 by the up and down keys, press the setup button again, and set the required stop temperature by the up and down buttons.
nttnttt
nttntttP2. Set the temperature correction:
nttnttt
nttntttIn the same way, enter the internal menu, switch to P2 by pressing the up and down buttons, press the setting button again, and set the required calibration temperature by pressing the up and down buttons. (Note: In the setting, if the detected temperature value is 0.5 °C larger than the actual temperature value, then the calibration temperature to be set is -0.5 ° C. If the detected value is 1 ° C smaller than the actual temperature value, the set calibration temperature is required. It is 1 ° C. Detection temperature + correction temperature = actual temperature.)
nttnttt
nttntttP3. Set the delay start:
nttnttt
nttntttIn the same way, enter the internal menu, switch to P3 by pressing the up and down buttons, press the setting button again, and set the required delay time by the up and down buttons, the unit is minute. (Note: Delay start is generally used for compressor refrigeration. If it is used in refrigerator freezer, this value needs to be set. According to compressor back pressure, the general setting is 3-6 minutes, if you are not using it for control or doesn't need delay function, skip directly.
nttntt
ntttInstructions:
nttnttt
nttntttStart temperature
nttntttStart temperature > stop temperature = cooling mode (output is connected to the cooling unit)
nttnttt
nttnttt1. Connect the power supply and heating or cooling equipment according to the wiring diagram above (note the positive and negative poles)
nttnttt2. Press and hold the up key to set the starting temperature. When the screen number flashes, press the up and down keys to set the starting temperature you want. After setting, wait for 5 seconds to brake the system.
nttnttt3. Press and hold the key to set the stop temperature. When the screen number flashes, press the up and down keys to set the desired stop temperature. After setting, wait for 5 seconds to automatically save the data.
nttnttt4. Restore the factory: Colleagues press and hold the up and down keys for 5 seconds, when the screen displays 888, the factory is restored.
nttnttt5. Press the power off button to turn off the thermostat and press to turn on the thermostat.
ntnTips:
n
n
nt888: In the case of power-on, press and hold the up and down keys for about 3 seconds, the digital tube displays 888, and automatically jumps to the detection temperature, that is, the factory settings are restored successfully.
nntLLL: Describe the sensor is open circuit, repair the sensor, or replace the sensor
nntHHH: The sensor is short circuit.
nt
nt
nnt
nt
n
n
n
n
n
n
n
n
n
n